Lattice Topped Raspberry Pie
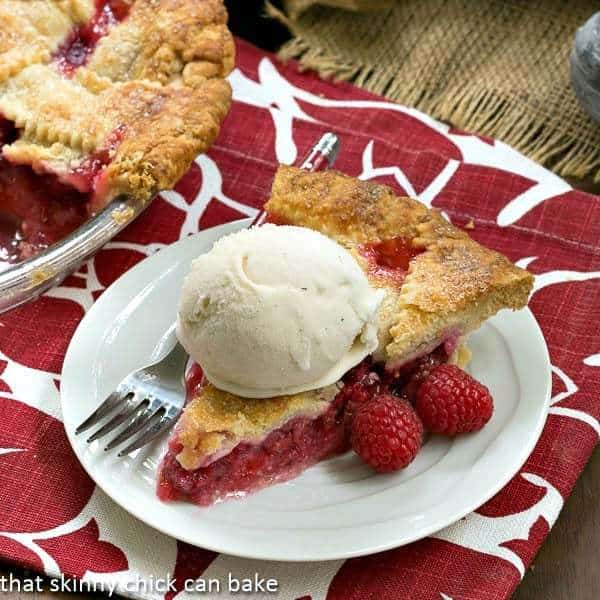
If I want to put a smile on my husband’s face I make this heavenly Lattice Topped Raspberry Pie. Check out the secret combination for the most exquisite pie crust, too!
A Berry Pie is a classic summer dessert. Whether your filling is fresh raspberries, strawberries, blueberries, or a combination, you’ll love a slice topped with a scoop of vanilla ice cream. This Blackberry Pie recipe is calling my name!
Why You Must Make
- If you want to make a good impression, serve a pie with a flaky homemade pastry crust.
- Raspberries or the combination of raspberries and peaches make outstanding fruit pies.
- This is perfect for summer gatherings when you can get local berries or grocery store berries at a decent price while they’re in season.
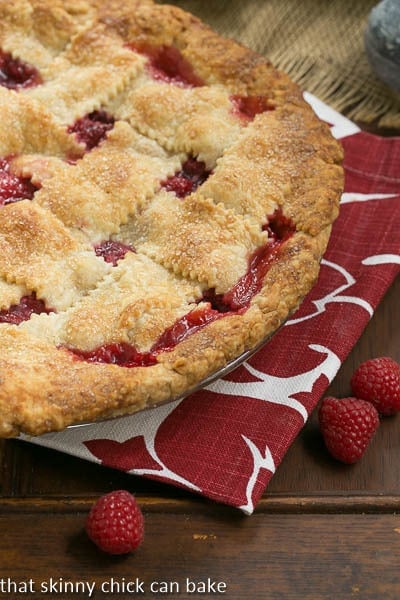
We had dinner guests last weekend; and after my friend, Barb, of Creative Culinary, raved about her pie crust made with leaf lard, I had to dig my stash out of the freezer. I baked up both a peach pie and this lattice-topped raspberry pie.
My pie crust is quite similar to Barb’s. We both use a combination of butter, for flavor, and lard, for exquisite flakiness. My leaf lard pie crust recipe made its debut in this blog post from Thanksgiving 2010. It’s outstanding. Scroll down if you’re new to making homemade pie crust for my tips.
Tips for Making Pie Crust
I doubt anyone was born knowing how to make a perfect pie crust. It takes loads of practice to recognize when the dough has enough water, is blended enough, and is rolled to the proper thickness. But a few tips will help make the process easier.
Choosing the Fat
- There are so many variations of fats that can go into pie crust. All lard, all butter, all shortening, or a mixture of these. Some folks use oil, but I’m not a fan. Each of these fats has benefits.
- I like using ⅔ butter for the flavor and ⅓ either shortening or lard for the flakiness they provide.
- PRO-Tip: Keep your fats cold. If you find you use shortening a lot in your crusts, consider keeping some stored in the freezer, so it’s always cold and ready to go. Some bakers chill their bowls and even the flour to keep the pie dough cool.
- I like using leaf lard, the highest grade of lard with little to no pork flavor, and known to produce the flakiest pie crust. It’s rendered from the pork fat found around the kidneys and the loin.
- Local friends in Indianapolis can find leaf lard at Moody’s Meats. It keeps well in the freezer and I always stock up at Thanksgiving.
- And also make sure to use the highest quality butter you can find. Look for European or European-style butter as they contain less water than American butter.
Mixing the Pie Dough
- PRO-Tip: Use a pastry blender or food processor to mix the fat or fats into the dry ingredients. You’ll want the mixture to look like cornmeal with a few pea-sized bits interspersed.
- Over-processed pie dough will not result in a flaky crust.
- Also, use ice water to moisten your dough, but make sure no actual ice gets into the pie dough. Do not add too much water.
- PRO-Tip: You want just enough so the dough holds together when you pinch it between your fingers.
Rolling the Pie Dough
- Wrap flattened rounds of your pie dough in plastic wrap and chill for at least 30 minutes before rolling. This gives the gluten time to relax and the fat time to rechill.
- Roll out the pie dough on a well-floured surface. Roll from the center outward and rotate the dough a quarter turn and repeat. If the dough doesn’t turn easily, re-flour the surface.
- Do not overwork the dough as you need to keep the small bits of fat intact as they make for a flaky crust when baked.
Fitting the Pie Dough into the Pie Plate
- Fold the rolled-out dough in half, then place and unfold it in the pie plate. Do not stretch the dough to fit, but instead, let it fall into place.
- If your crust has gotten warm during the rolling and fitting process, chill it again in the pie plate.
- If your pie needs a top crust, make sure to add some vents to let the steam escape. Lattice-topped pies have natural vents.
Baking a Raspberry Pie
- Bake your pie on a baking sheet to help catch any juices that might drip from the pie. It also will assist with cooking the bottom crust by providing direct heat.
- Bake in the lower third of the oven.
- If the crust starts getting too brown before the pie is done, tent with foil to help reflect the heat.
Frequently Asked Questions
Fruit pies need a thickening agent like flour, cornstarch, or tapioca. This pie uses instant tapioca and cornstarch. The advantages of tapioca are that it doesn’t deteriorate when exposed to acid ingredients and won’t turn cloudy or lose its effectiveness at room temperature. It must sit in the fruit juices for about 10 minutes and then cook almost to boiling to thicken the filling properly.
Cornstarch must also be mixed with a liquid before adding it to the filling so it won’t create lumps when it’s cooked. It will create a clear jell after it gets hot enough to bubble/boil.
If you don’t add enough thickening agents for the amount of fruit, the filling will be runny. And if you use cornstarch or tapioca and the filling doesn’t get hot enough, it will not gel. With a lattice crust, it’s easier to see if the filling bubbles, but if your pie has a solid top crust, peek into the air vents to look for signs of bubbling. Bubbling filling indicates it’s hot enough to thicken properly.
When a pie is filled with wet filling, it takes some time for the heat of the oven to cook the bottom crust. The bottom crust can absorb some of the moisture from the filling before it bakes. With a single-crust pie, you can blind-bake it or bake it before adding the filling, but that can’t be done with a double-crust pie.
Instead, you can bake the pie on a sheet pan instead of directly on the oven rack. The pan will provide direct heat to the bottom of the pie, helping it cook faster.
The baking time in this recipe is a general guideline. You may add more fruit or less fruit plus all ovens bake a bit differently. As the lower end of the baking time nears, look at the crust as it should be golden brown. Also, eye the middle of the pie filling. In order for the filling to thicken, it must be bubbling.
Don’t expect a rolling boil like when boiling water, but instead just bubbling visible between the lattice strips. If you make a solid top crust, a few vents must be cut to release steam. Check the vents for bubbling.
Yes, you can freeze a baked, cooled, and well-wrapped raspberry pie for up to 2 months. Defrost overnight in the refrigerator, then warm in the oven before serving. An unbaked pie can be stored for up to 3 months. Bake right from the freezer, but you’ll need to extend the baking time.
You May Also Like
- Blueberry Crumb Pie from Saving Room for Dessert
- Razzleberry Pie is a childhood favorite with 3 different berries
- Freeze and Bake Blueberry Pie
- Raspberry Bundt Cake Recipe
- Peach Raspberry Galette
- Apple Pie from Scratch
- Plus, here’s one of my favorite Raspberry Recipes (a yummy Raspberry Crisp!)
- Also, check out my Recipe Index for all my Pie Recipes

Lattice-Topped Raspberry Pie Recipe
An exquisite fresh raspberry pie with the ultimate flaky pie crust recipe!
Ingredients
Crust:
- 2 ½ cups flour
- ½ teaspoon salt
- 1 tablespoon sugar
- 12 tablespoons cold premium butter (Kerry Gold or other European butters work well), and cut into ½ inch pieces
- 8 tablespoons lard, leaf lard preferred, cold, and cut into pieces similar size to the butter.
- 6-8 tablespoons ice water or enough till crust just holds together when pinched between your fingers
Filling:
- 1 ⅓ cups sugar
- 2 tablespoons quick-cooking tapioca
- 2 tablespoons cornstarch
- 5 cups fresh raspberries
- 1 tablespoon butter
Glaze for crust:
- 1 tablespoon of milk
- Sugar
Instructions
- In a food processor, pulse together flour, salt, and sugar to mix. Add butter and lard and pulse 3-5 times, till the mixture resembles cornmeal, with a few pea-sized chunks of fat. Add ice water one tablespoon at a time, until the dough starts to hold together.
- Form dough into two balls and flatten them into disks. Wrap in plastic and refrigerate for one hour or longer. Roll and fit the pie tin with one round of crust; trim the edges to just a bit wider than the pie plate. Place in fridge while preparing to fill.
- In a large bowl, combine the sugar, tapioca, cornstarch, and raspberries; let stand for 15 minutes.
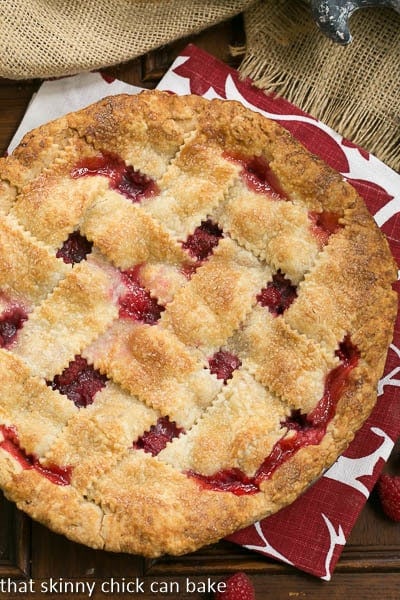
- Roll out the remaining dough to at least a 12-inch circle. Cut into strips 1-1¼ inches wide. On a Silpat or piece of parchment, weave strips into a lattice crust.
- Start with your two longest strips crossing over in the center. See the link below for more details. You can also not weave, but instead, lay half the strips in one direction, and lay the other half over them perpendicular to the first set.
- Space the strips so that the lattice will cover all the fruit filling. Slide Silpat or parchment onto a flat baking sheet and chill for a few minutes to let the dough firm up slightly, but not so long that it gets hard and brittle.
- Scoop filling into the pie plate and dot with pieces of the 1 tablespoon of butter.
- Carefully transfer the lattice crust and center it over the top of the pie (I use a large cake mover). Trim, seal, and flute edges. Brush with milk; sprinkle with sugar.
- Bake at 350° for 50-55 minutes or until the crust is golden brown and the filling is bubbly.
- Cool on a wire rack. Serve with vanilla ice cream.
Notes
Filling inspired by Taste of Home recipe.
May use shortening if leaf lard is not available.
European butter has less water and works well for pie crust.
Total time does not include chilling time for pie dough. You can also weave the lattice crust right on top of the pie.
Your strips may get stained from the process of plaiting, but the juices will bubble onto the lattice during baking, so the top will never be pristine.
There are photos of how to make a lattice crust on Simply Recipes.
Recommended Products
As an Amazon Associate and member of other affiliate programs, I earn from qualifying purchases.
Nutrition Information:
Yield:
8Serving Size:
1 sliceAmount Per Serving: Calories: 644Total Fat: 35gSaturated Fat: 19gTrans Fat: 1gUnsaturated Fat: 15gCholesterol: 67mgSodium: 296mgCarbohydrates: 78gFiber: 6gSugar: 39gProtein: 5g
Thatskinnychickcanbake.com occasionally offers nutritional information for recipes contained on this site. This information is provided as a courtesy and is an estimate only. This information comes from online calculators. Although thatskinnychickcanbake.com attempts to provide accurate nutritional information, these figures are only estimates. Varying factors such as product types or brands purchased can change the nutritional information in any given recipe. Also, many recipes on thatskinnychickcanbake.com recommend toppings, which may or may not be listed as optional and nutritional information for these added toppings is not listed. Other factors may change the nutritional information such as when the salt amount is listed “to taste,” it is not calculated into the recipe as the amount will vary. Also, different online calculators can provide different results. To obtain the most accurate representation of the nutritional information in any given recipe, you should calculate the nutritional information with the actual ingredients used in your recipe. You are solely responsible for ensuring that any nutritional information obtained is accurate.








39 Comments on “Lattice Topped Raspberry Pie”
I’ve made a lot of pies in my time, but never a raspberry one. I’ll bet this is just bursting with flavor:@)
I am a big fan of that butter too. Oh an this gorgeous lattice top pie. So delicious.
This is absolutely amazing! Such an amazing dessert!
The pie is a crowd pleaser every time I make it!
Fabulous pie! Hubby and I really enjoyed this! So yummy!
Can I replace quick tapioca with more cornstarch or sometthing else and did you ever use frozen raspberries for this recipe? It looks amazing Lizzy!
Yes, you can certainly use frozen raspberries, though sometimes I find frozen fruit needs a little more thickener. And cornstarch would work, too—you should only need about half as much. Here is a reference FYI: https://www.reference.com/food/can-substitute-2-tablespoons-quick-cook-tapioca-powder-a8009c6a52bf9a3f# (https://www.reference.com/food/can-substitute-2-tablespoons-quick-cook-tapioca-powder-a8009c6a52bf9a3f#)
Hope you love your pie!!
Dear Lizzy, what a beautiful pie! I would love a slice of this…reminds me of the warmer days to come! xo, Catherine
This looks marvelous! I love raspberry pie – it reminds me of summer and my grandma. We always had one during our visits to Maine.
This pie looks so good – who can resist a raspberry filling in a sweet pie crust.
I love your secret to the prettiest, flakiest pie crust, Lizzy. I have to try using a combo of butter and lard next time. This looks soo perfect! Mmmmm…now I want to get baking!
Toodles,
Tammy<3
I’ve been hearing about leaf lard and now you’ve convinced me I must find some and try it. Your pie looks so good it makes me want pie NOW!
What a GORGEOUS pie! I bet it was absolutely delicious. Thanks for linking to my lattice instructions! 🙂
I hope to find the lard and the butter before the holiday baking frenzy begins. Great looking pie Liz!
That raspberry pie looks heavenly! I wish I had a good source of lard.
Mmmmm…looks delish. The pastry on top looks so crusty, and I bet is an awesome contrast to the raspberry filling. Perfect for a Sunday, Friday or any day treat….lol.
Sharing now through Triberr 🙂
this looks so good! it reminds me of the first and only time i had raspberry pie–at a delightful bakery in maine! delish.
This raspberry pie looks delicious Liz ! Since I traveled for the first time to England I’m a fan from apple pie, this raspberry pie looks so good !
At Christmas, I make my grandmother’s Christmas Mince Pies. I’m quite sure these aren’t an American thing because they were accepted on Foodgawker and noone looked at them. I heard they thought they were fruit pies filled with mince! These are a British pie made with minced fruit (diced fruit) and you have to make them with lard. For the last few years I have scoured the country trying to source lard for the pastry and the fruit mince but it’s been too hard to source. I’ve had to make them with butter but it’s not quite the same. Your lattice pie looks amazing xx
Thank you for the intro to leaf lard, Liz. Good thing your lovely lattice (so professional!) raspberry pie isn’t in front of me. I am a tad hungry and I’d devour more than a slice! =)
What a gorgeous pie! I’ve never been able to make pie as pretty as this!
What a beautiful pie! Love the pretty criss cross crust!
This looks droolworthy, Liz. That crumbly crust and sweet tangy raspberry filling are just irresistible.
this is the most beautiful pie!! I’m drooling looking at the photos!
Mary
LIzzy,
Your pie has me drooling. My pie crusts don’t turn out as well as yours but I’ve never used lard before.
Annamaria
I saw this on Google+ and started drooling. It looks wonderful I will definitely be looking for leaf lard. I’m embarrassed to say that I’ve never heard of it till now. Thanks Liz!
Hi Lizzy!
Your beautiful raspberry pie is a work of art and wouldn’t last a minute in my house, thanks for sharing your tips
Love this raspberry pie Lizzy!
Beautiful!
What a stunning pie, I love that lattice topping!
I rarely get excited about a dessert without chocolate but if I do it is normally for a raspberry pie. This looks great. Raspberry pie was the ultimate summer treat for me visiting my grandma in Maine. This always followed our lobsters 🙂
Raspberry pie – what bliss! I’d be downing the leftovers one slice at a time too!
I love your fat lattice stripes. Very pretty and my what a pie!
Liz,
This pie is perfection! I have never heard of leaf lard but I can’t wait to look for it! I’ve heard that the best pie crusts are a combination of butter + fat. I need to try this ASAP! and your lattice top is so so pretty!! beautiful job as always!
I made this raspberry pie today with the homemade crust. It was absolutely outstanding! I don’t think I’ll ever go back to Pillsbury crust again!
I’m so glad it was a hit, Joyce!! I’d never had a raspberry pie until I met Bill’s family—and now it’s a favorite!! xo
I was going to ask how much that butter costs but then I read you received coupons for them. Butter can be anywhere from $1.99 to $6.99 for a pound (454 g) and organic can go as high as $9.99! I may just have to splurge for Thanksgiving as my hubby’s family are true pie lovers.
Welll now it doesn’t get any better than this kind of pie for me. My dads favorite when I was growing up and became mine.. such sweet memories with him for me.. thanks for bringing that memory alive this morning put a smile on my face ….xo
What a delicious pie Liz, I can smell it from here 😛
Cheers
Choc Chip Uru
I’ve never had a raspberry pie Liz, I’ll bet it’s amazing:@)