Instant Pot Clotted Cream
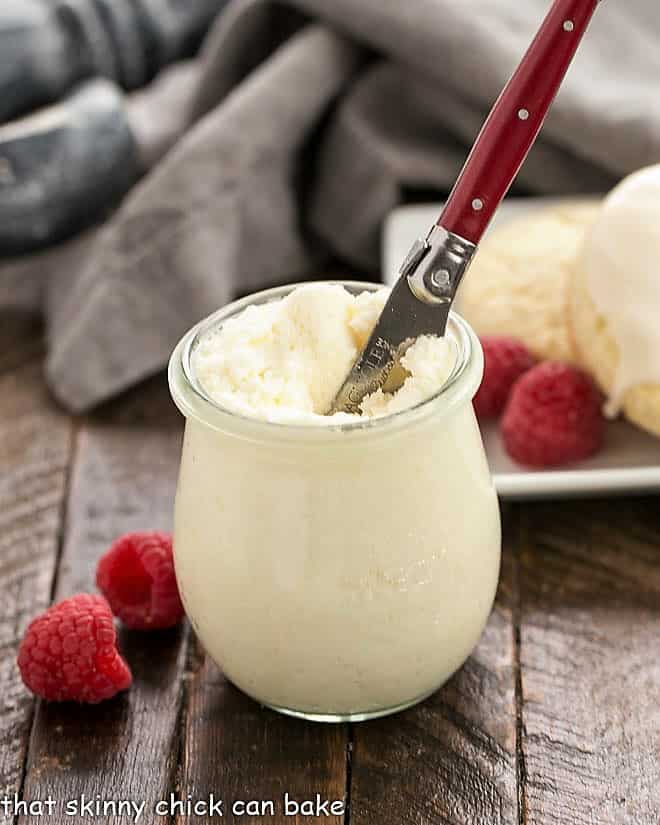
Instant Pot Clotted Cream: A simple, hands-off recipe for clotted cream. Perfect with your scones for early morning Royal Wedding viewing or an upscale breakfast or brunch! Reign, err I mean rein, in your inner anglophile with a classic British tea time treat.
My friend, Sally, once again planned a pre-dawn gathering to watch a royal wedding. This time it was Prince Harry and Meghan Markle getting hitched. Fascinators and all things British were planned. Scones were to be baked, so I knew I’d have to give Devonshire Cream another shot. Instead of the oven, I turned to my trusty Instant Pot for an alternative method to make Homemade Clotted Cream.
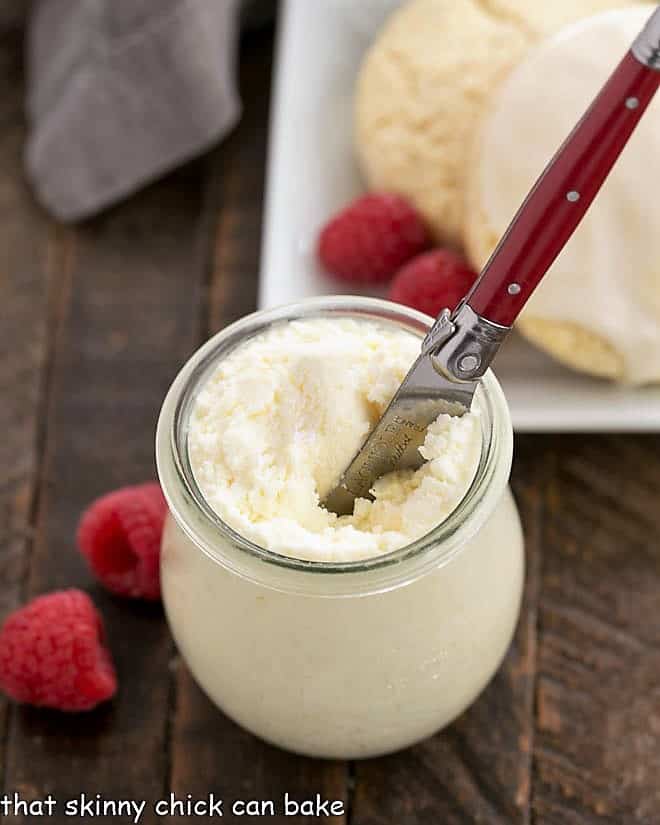
Why You Must Make
- It only requires ONE ingredient and a little patience.
- Making it in an Instant Pot speeds up the process. An oven version I’ve made takes hours and hours before “clots” develop.
- The flavor is spot on. See one reader’s review below!
Reader Testimonial
Testimonial from Becca: “I really wanted to say thank you again. I have been trying to find clotted cream since we got back from Scotland with no luck, and my stove isn’t reliable. Recipe turned out perfect, and it really made my weekend.”
The first time I made clotted cream, it was in the oven. Since I’d only experienced this traditional British spread from out of a jar, I really didn’t know what to expect. A thick, yellow-coated cream rose to the top of my baking dish, leaving liquid whey below. That was the clotted cream! It wasn’t very appetizing at first glance, but according to Sally, the taste was spot on.
I was always a little suspicious of those little jars of clotted cream in the grocery store. Was it the same quality as what the British were spreading on their teatime scones along with a smear of jam? My experience was limited, but I wanted to try making my own.
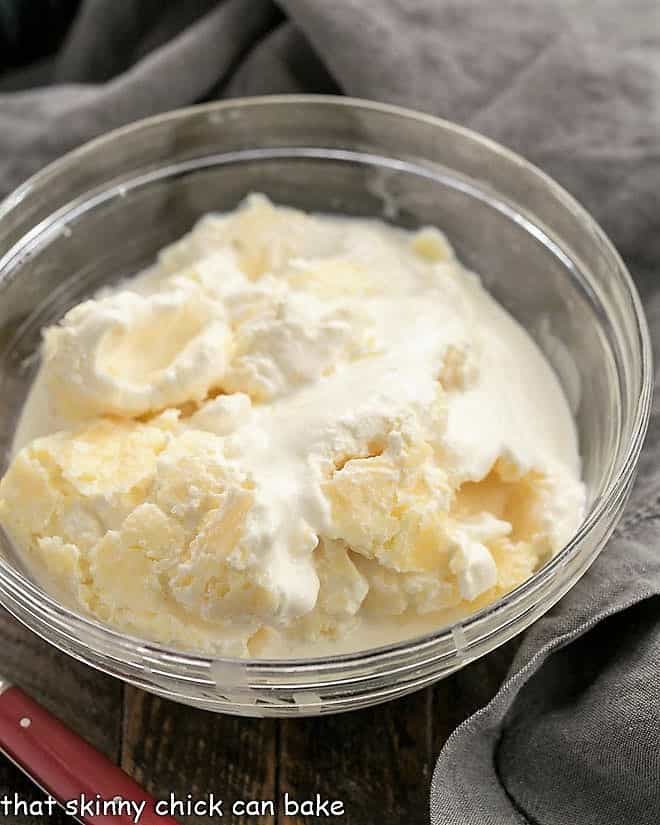
How to Make
The recipes I found online were all similar. Cook heavy, pasteurized cream for a long time at a low constant temperature. OK, I was game. I’ve made it in the oven using a wide, shallow baking pan but wanted to explore an Instant Pot version, too.
Made of only heavy cream, this is a rare one-ingredient recipe. So it’s important to track down the rather elusive pasteurized cream instead of the ubiquitous ultra-pasteurized heavy cream. This may be the biggest challenge in making clotted cream. Call around before putting a lot of mileage on the car in your search. The higher the fat percentage, the better, but in the states, you may be limited. British double cream is 48% milkfat, whereas US whipping cream must be 30%, and heavy cream 36%.
- Try to Locate Pasteurized, not ultra-pasteurized heavy cream.
- Next, Heat the cream at a steady 170-180º for 10-12 hours or until a thickened layer or “skin” develops over the liquid whey. The top may color slightly, but the goal is to remove the clotted cream from the oven or Instant Pot before it tans.
- Cool for 8 hours, then use a slotted spoon to remove the thickened clotted cream from the top of the liquid. When using the oven method, you can cover your baking dish with foil if you prefer a very pale yellow or cream-colored clotted cream.
Expert Tips
- PRO-Tip: If your clotted cream seems too thin at this point, place some cheesecloth in a strainer, add the clotted cream, wrap the cheesecloth over the top, and let it drain over a bowl in the refrigerator for an hour or so.
- PRO-Tip: If you don’t like the thickened “skin” mixed into the clotted cream, whisk the mixture to a smoother texture. Add some of the whey (leftover liquid) to thin as needed. Many Brits covet the yellow coating, finding it to be the most flavorful, desirable part of the clotted cream. A slightly grainy texture is perfectly normal with clotted cream.
- Read your heavy cream labels carefully and buy pasteurized heavy cream. The ultra-pasteurized cream has been heated to a higher temperature to increase its shelf life, but will not produce the best results when making this clotted cream recipe. I can consistently find pasteurized heavy cream at Whole Foods and have been told that Trader Joe’s also may carry it.
How to Make Clotted Cream in the Oven
With my first attempt, instead of trying to keep the liquid at 170-180º on the cooktop, I moved my pan of warmed cream into the oven. Luckily, my oven has a warm setting where I can set temps below 200º.
- Use a shallow baking dish and ADD the cream to a depth of 1-2 inches.
- Let COOK at 170-180º for 12 hours (doing this overnight makes perfect sense unless you sleep longer than 12 hours!).
- Remove from the oven, let COOL at room temperature for an hour or so, then chill in the refrigerator for about 8 hours or overnight.
- REMOVE the clotted cream, including the “skin” with a slotted spoon, and enjoy!
How to Make Clotted Cream in an Instant Pot
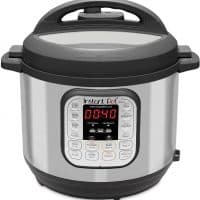
When I discovered that the Instant Pot could gently keep the cream warm in a steamy environment, I knew I’d have to give this method a shot. With the royal wedding looming, the timing was perfect. The procedure was similar to the oven method.
- Bring the cream to a boil in the Instant Pot using the YOGURT Setting.
- Then adjust to BOIL.
- Finally WARM for 10-12 hours after the cream is brought to a boil.
- When the low and slow cooking period is over, RELEASE the pressure and let it COOL at room temperature before CHILLING for 8-12 hours.
- REMOVE the clotted cream with a slotted spoon as with the oven method.
The homemade clotted cream was a perfect addition to the viewing party menu as there would also be homemade scones, purchased clotted cream, strawberries, elderflower cake, and an egg casserole! What a feast!

How to Serve Clotted Cream
- If you’ve never had scones fresh from the oven, you must give them a try. Best on the day they’re made, they can also be frozen so you can enjoy them all week long.
- Like pie crust, it’s important not to overwork the scones dough, so you have tender results. You’ll want teeny pieces of cold butter dispersed throughout for the perfect texture.
- Scones are the perfect vehicle for clotted cream. But don’t forget that muffins, quick bread like banana bread, Irish soda bread, and tea cakes are also delicious smeared with homemade clotted cream.
- Try it with fresh berries, pancakes, or waffles. You can also use clotted cream in place of some of the heavy cream in ice cream and homemade truffles. Add it to mashed potatoes or risotto. Even scrambled eggs will be creamier with a dollop of clotted cream.
Frequently Asked Questions
Clotted Cream is an English specialty for which the counties of Devon and Cornwall are famous. It’s also known as Devonshire cream, Devon cream, and Cornish cream after those locales.
Across the pond, it is an essential topping for scones, and scones and clotted cream are often paired with jam. It’s a thick, creamy, slightly sweet, and nutty dairy spread that is also wonderful on biscuits, muffins, English muffins, croissants, and other baked goods.
Clotted cream tastes like unsweetened heavy cream or unsalted butter, but with a subtle sweetness from the natural sugars in dairy. The Maillard reaction creates very subtle caramel undertones. The texture is more of a thick, spreadable cream, like Mascarpone.
The refrigerator shelf life of clotted cream, including this Instant Pot Clotted Cream, is about 3-4 days, but it does freeze well for longer storage.
You May Also Like:
- Lemon Blueberry Scones from Mom on Timeout
- Lemon Scones
- Vanilla Scones
- Easy Scones Recipe with Strawberries
- Best Scones Recipe with Blackberries
- Fresh Peach Soda Bread or any quick bread would be delicious served with clotted cream.
- More Easy Breakfast Recipes
- More Brunch Food

Instant Pot Clotted Cream Recipe
A homemade version of the classic clotted cream used to top British scones made in the Instant Pot.
Ingredients
- 2 pints heavy whipping cream, pasteurized (not ultra-pasteurized which is the norm)
Instructions
- Pour the heavy cream into the Instant Pot.
- Seal the lid and turn the vent to SEAL. Press the YOGURT button and then ADJUST to BOIL.
- When it signals to let you know it's boiled, set your IP to WARM for 10-12 hours. or reset with the yogurt button to 12 hours, it keeps it warm (about 100 or 105 degrees) for 12 or 24 hours,
- Let cool at room temperature for about a half-hour, then cover with plastic wrap, place in the refrigerator, and chill overnight.
- Remove the lid. The liquid will have a yellow thick layer on top. Carefully skim the thickened topping off of the top and into a container. Top with a lid and store in the refrigerator until ready to use.
Notes
- It's very important your IP reaches 180 degrees. If your IP is smaller than 8 quarts or you live at a high altitude, you may need to cook an extra cycle.
- If you'd like to try the oven version, preheat the oven to 180º, place the cream in a shallow baking dish at a depth of 1-2 inches.
- Let cook for 12 hours. Then follow the same procedure as in the IP recipe to skim and chill.
- Using a whisk may be helpful if you prefer a smoother consistency, then mix in some of the leftover liquid to thin if necessary.
- Drain your clotted cream in a strainer lined with cheesecloth if you'd like a thicker product.
- Store in a covered container and use within 3-4 days
Recommended Products
As an Amazon Associate and member of other affiliate programs, I earn from qualifying purchases.
Nutrition Information:
Yield:
24Serving Size:
1 tablespoonAmount Per Serving: Calories: 135Total Fat: 14gSaturated Fat: 9gTrans Fat: 0gUnsaturated Fat: 4gCholesterol: 45mgSodium: 11mgCarbohydrates: 1gFiber: 0gSugar: 1gProtein: 1g







90 Comments on “Instant Pot Clotted Cream”
I’ve been missing England like crazy since we first visited 4 months ago. I made this with scones and jam and it literally made me cry. It tasted exactly like it did in the Cotswolds, and I am beyond happy I found this recipe.
I managed to find one non-ultra pasteurized heavy cream near me. I set it on boil in the instant pot and checked the temp, but felt it needed another cycle. I kept it on warm overnight, and the next morning put it in the fridge. The following day I made scones and this was the perfect consistency. Thank you so much for this recipe!!
Oh, I’m so glad this was a delicious topping for your scones, Jane! Thanks so much for letting me know.
I’m at High altitude and have a small IP. How will I know if it needs “another cycle” (assuming that means another 12 hours) after the 1st cycle? What will it look like if it’s not ready?
Hi, Annie, When it’s done, you’ll have a thicker layer over a more watery layer. You should be able to take a slotted spoon and remove the “clotted cream” from the top. It could have a yellow crust. If you only see liquid and no solids, it’s going to need more time. I hope that helps!
Hi, Annie, You will look for “clots” or a thick, crusted layer floating over the milky liquid. If there is nothing you can remove from above the liquid layer, you’ll need to keep cooking. I hope that helps!
I’m excited to give this recipe a try but my instant pot duo crisp does not have a yogurt setting. Any suggestions? I’m also very new to instant pot so don’t have much experience. Any help would be appreciated! Thank you!
Hi, Pegita,
Check your manual to see what slow cooker settings you have available. See if one of them is more of a warm temperature vs a cooking temperature. Otherwise, if your oven can be set to 180 degrees, that will work, too. Hope that helps!
I came here because I was looking for uses for clotted cream. It’s gotta be useful for more than scones and jam.
Hi, Raul, I will see what other uses I can find!
Raul, you can serve with fresh berries, on banana bread, Irish soda bread, pancakes or waffles. There are recipes to use it in ice cream, homemade truffles, mashed potatoes and risotto. You can top or stir into soups, add to scrambled eggs to make them extra creamy or add to oatmeal. Hope that gives you a few ideas.
I can’t wait to give this a try. I love that you are doing this in an instant pot.
So good, I cannot make it fast enough as my family as well as I love it.
Hi! I just made this, and the cream tasted amazing. I can’t wait to have it with my blueberry scones that ar win the oven.
I do have a question, though. What do I do with the leftover liquid? i have quite a bit, I’m wondering if maybe I should have boiled it twice like other commenters suggested. Thanks!!
Great question, Mary. You can use it to thin your clotted cream if you’d like it looser. My friend, Susan, uses it to make scones. I usually toss it 🙂
Hey Liz,
I was wondering if I could double this recipe? would I need to double the time as well?
Hi, Sam,
I know when I make it in the oven, it has to be in a large enough pan so the cream is shallow as it cooks. A far as making it in the Instant Pot, my best guess is that it’s best to keep it shallow, too. I’m afraid that if you’d double the recipe, there may not be double the clots, even with extended time. I wish I had a definitive answer. Please let me know how it works out if you give it a try.
I have a crockpot express not an instant pot. It has a yogurt button, I just don’t know how to adjust to boil. I started it and looks like it will for 8 min. Then I can keep at warm for 12 hours. Willi still get clotted cream with just the yogurt setting?
Laura, I think I understand that the mixture will not boil? You could always boil it on the stovetop, then keep it at the yogurt setting for 12 hours. Good luck and please report back!
How do you make this if you don’t have the yogurt setting? Thanks for your help!
Hi, Alyssa,
You can always make it in your oven. Set your oven to 180 degrees and cook for 12 hours. I like using a roasting pan, and you can cover it with foil to keep the top from getting too dark. Cool at room temp until you can chill in the fridge for 8 hours, then scoop out the clotted cream. Hope that helps!
I used the oven at 175F and went ~18hrs. Refrigerated for ~24 hours and skimmed off the clotted cream.
\My wife was suspicious of the entire process…. baked some fresh English (soft) scones and put some fresh, home made strawberry jam on one side and the cream on the other.
One bite and she was hooked! Thanks for your recipe! Doug
So happy it was a hit for you, Doug! I was suspicious the first time I made it, too. Glad both you and your wife enjoyed it!!
I just finished making clotted cream in my 6 qt. Instant Pot Ultra. Here’s my experience so far. I used 2 pints of Pasteurized Heavy Whipping Cream from Aldi. (They actually sell non Ultra Pasteurized now!) After pouring the 2 pints into the inner Instant Pot liner, I closed the lid and made sure the venting button on top was pushed. I selected the Yogurt setting and chose High under that. That showed the word BOIL After it finished the BOIL cycle I tested the temperature and found it to only be 155 degrees F. I went through another BOIL process and got it to 180 degrees F. After the second BOIL cycle I pushed cancel. I then chose Slow Cooker, custom set the temperature to 180 degrees to cook for 10 hours. After the ten hours were up I definitely have a yellow crust. Now I need to refrigerate it for 12 hours. We’ll see how much cream I get.
Thanks so much for sharing how to make this clotted cream using your IP, Sylvia. This is very helpful! I hope you enjoy.
You don’t have to cancel it after the boil cycle. Just reset with the yogurt button to 12 hours, it keeps it warm (about 100 or 105 degrees) for 12 or 24 hours, whichever you choose. It’s the whole purpose of the yogurt setting.
Good to know, Chas. I rarely use my IP. Thanks!!
Ohmygosh! You are a magician! I’m having a birthday afternoon tea for my sister-in-law and our kids and wanted to have all of the accompaniments. This clotted cream was not only easy and affordable to make, it’s delicious! Well done! I am freezing half of it because the recipe makes plenty. I did pour the thickened cream into a mixing bowl with a bit of the liquid and mixed it with a hand mixer before putting in jars—perfect. I will be making this again! Thank you!
Oh, I am so pleased it was a hit!! Thanks so much for letting me know, Maureen. Have a terrific weekend.
I have an 8 qt instant pot duo. I have a yogurt button but I don’t see a boil button? Sorry I’m a little confused..do I need a different infant pot to make this? I would love to try it!
Hi, Carly!
There are so many different pressure cookers, that it can be very confusing. A SOUP setting will bring your liquid to a boil, so you could try that. Also, some YOGURT settings have a boil option, too. Check your manual to see if yours does.
Here is my friend Barbara’s post on different IPs and their settings….hope that will help, too:
Hope that will help!
Carly- On an 8qt Duo, you do not have Boil button. The “boil” she is referring to is obtained by first pressing the Yogurt button, and then pressing the Adjust button followed by the + which should bring up the word “boil” on your display.
Hi,
I was wondering what the best method of checking the cream temperature?
Thank you!
Hi, Sarah, Great question. My instant pot’s warm setting is about 172 degrees. I just went with that and did not open the lid to check the temperature. If you’re concerned that your IP won’t register that hot on the warm setting, you could open it after has boiled and cooled to warm (could be an hour later) do a quick check with an instant read thermometer, then return the mixture to warm. Also, you might find more details about your model’s temperature setting for warm in your appliance’s manual. Hope that helps!
I need to know, on warm mode there his 3 choices, less-normal-more. Witch one i have to set. Thanks.
I don’t own a pressure cooker/IP with those options, but I’m thinking the “Normal” is the yogurt setting which would be the right temperature for clotted cream. Check your manual if you have it available to double-check. Hope it works for you!!!
I was not at all familiar with clotted cream before trying this recipe. It is a great addition to fresh biscuits for our Sunday morning brunch!
I have never tried clotted cream and after reading your post I sure want to try…it sounds so delicious and with the help of Instant Pot seems easy enough. Thanks for the recipe Liz…have a great rest of the week!
I love scones so much, and I can’t believe I’ve never had clotted cream with them. I need to fix this! The Instant Pot sounds like the perfect way to go to make it.
Oh Clotted Cream is so delicious but a rare treat. It also very hard to find here, you must go to specialty food shots. Thank you for sharing these two homemade methods.
looks absolutely delicious Lizzy , with jam on scones is amazing!!!
hugs xoxo
Where do you find the pasteurized not Ultra pasteurized heavy cream? I’m only finding the Ultra Pasteurized…
I’ve only had luck at Whole Foods, Kathy. Hope you have one in your area!
If it’s too thin, why not just strain it like when making greek yogurt?
Good idea, Michele. That’s basically what I try to do by removing the clotted portions with a slotted spoon. Thanks for the input!
You are right, perfect on a scone!
So delicious- what a fun idea to serve with scones for company!
This was so good!! Thank you so much for the tips!
So easy to make in the Instant Pot.
Scones with this clotted cream and jam is angel food!
Love adding this to treat! Tastes so good.
Hmm. I tried this and set the instant pot for 8 hours with two pints of pateurized cream not ultra pasteurized). I did see a slight skin for but it was so watery. At leadt in the oven method you see a a light layer of cream but this method was just liquid. I’m willing to give this another shot but trying to set this to at least 12 hours. It could aldo be that there is not enough surface area in the instant pot. Make sure that its no more than1-2 inches deep
Sorry you didn’t have success with this recipe. Make sure your cream reaches 180 degrees—you may need to run it an extra cycle. Altitude and different sized IPs may affect the outcome. Thanks for your suggestions!
Hi Liz,
Great recipe! I just made delicious clotted cream in my crock pot but will be getting an instant pot for Christmas. What size Instant pot did you make your clotted cream in? Love your website!
Thanks, Elaine! I have an 8 qt Instant Pot. Hope you give it a try!
Tried the recipe yesterday and it turned out perfect. My mom said it tastes just like the clotted cream she has growing up in Britain.
Very important to make sure the cream reaches 180 degrees before setting the IP to warm. I live at 6300 ft so it took 4 cycles on the yogurt boil cycle before the correct temperature was reached. I also drained off some of the whey into a bowl by separating the cream from the IP with a knife. Keep the whey in case you need to mix a little into your clotted cream to get the desired texture. ENJOY!
Love that you made your own clotted cream. Homemade is always better!
SO I tried another recipe once and did end up with the right stuff. The problem is it looked all wrong. Now I know and can’t wait to try this version.
You are a genius for making clotted cream in the IP, Liz! What a great use. I love my IP.
You brought me right into my Nana’s kitchen! I miss having clotted cream and scones. Love using the Instant Pot. Going to make your recipe and some scones this weekend! I make traditional scones for my family often. I am making your delicious blackberry scones. They are going to love the scones and clotted cream!
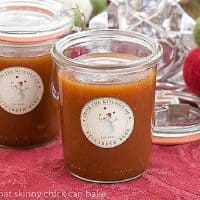
Where can I find a jar like the one in the picture? I am making clotted cream to surprise my mom and I really like that jar!
They are Weck jars—here’s a link from Amazon, but maybe you can find some locally 🙂 https://affiliate-program.amazon.com/home/productlinks/customize?asin=B00F739OFC&request_source=quicklinks&subflow=sp_ (https://affiliate-program.amazon.com/home/productlinks/customize?asin=B00F739OFC&request_source=quicklinks&subflow=sp_)
Oh now I want a scone like one of these…and clotted cream!! How fancy, Liz!
Now this is one I need to try! Thanks, Liz!
I’ll never forget the first time I had clotted cream, we were vacationing in the UK and visiting JT’s great Aunt who was well into her 80’s and still managing a house on her own. I had never had clotted cream and I was hooked, so delicious. I’ve made crème fraîche before but not clotted cream. What a treat it would be.
You just brought back some wonderful memories of visits to my Aunt’s house in England. She always had scones and clotted cream. I would never think to make it at home… but you always do everything so fabulously… I know your recipe would work!
Hi from a tribemate :). I’ve seen other recipes for clotted cream that made me very nervous. This seems doable for the average kitchen mortal so I’ve pinned to give it a try. Thank you!
What an interesting story! I have never even thought about trying to make clotted cream. I may have to give it a go 🙂
Thanks so much for sharing
Julie
Gourmet Getaways
I had no idea clotted cream was so easy to make. I’ll definitely have to give this recipe a try.
I’ve never tried clotted cream but it sounds like something the Mr and I would enjoy.
Dear Liz, not only does your Clotted Cream look absolutely irrestible but your Strawberry Buttermilk Scones scream my name….got to try that recipe as soon as I can find suitably sweet strawberries at the market! What fabulous recipes – scones and clotted cream certainly are a match made in heaven!
I think I have mentioned this to you before Liz, I forget how lucky I am sometimes living in the UK and so close to mainland Europe. I grew up in the South West of England and you were never more than an hour away from a dairy farm that produced their own clotted cream. You could cheaply buy it in large tubs fresh from the farm. Same with the clotted cream ice creams, I loved those as a kid. Still do! Well done for making your own clotted cream, it never even crossed my mind how to make it and it does sound like those little glass jars won’t be the best. So congrats Liz 😀
I need to make my own clotted cream too. Thanks for sharing, Liz.
This is a terrific idea. I love clotted cream because I love scones ! I didn’t know that we can do our own clotted cream ! This sounds so good. Have a lovely weekend Liz 🙂 x
i’m surely dense, but the directions confuse me.
“The liquid will have a yellow thick layer on top. Carefully skim the thickened topping off of the top and into a container. Resist the urge to whisk the clotted cream as it will become grainy.”
which is the clotted cream? the thick yellow layer or what’s underneath it?
do you keep one part & discard the other?
Hi, Norma,
All the thicker stuff at the top is the clotted cream—you will remove and save it all. You discard the more liquidy cream below. You may get a yellow “skin” on top which is part of the clotted cream. There will be more of the liquid than the clotted cream. You are definitely not dense—it’s hard to explain!
My homemade clotted cream has saved me millions (well, almost) of dollars over the years not buying those crazy expensive little jars from England, yay for homemade!!
I have often wondered how they made clotted cream – now I know! Great post.
Wow! I can make clotted cream now. Thank you, Liz! P.s. Looking forward to trying out some of your scone recipes, too =)
Interesting post! The clotted cream looks yummy. It sounds like it is quite the process, but worth the effort.
Hi Liz:)
Congratulations on making your clotted cream! Your scones look pretty amazing too! I would love a taste of both, I’ll have to dream I suppose:)
I had no idea clotted cream was so easy to make. It’s not much different than making yogurt. I use the oven most times when I’m making a lot of yogurt but when I’m just making enough for the week, I use a yogurt maker. I have a feeling the clotted cream would “cook” up nicely in the yogurt maker too. (I bet a slow cooker would work also:) I’ll have to give it a try and see what happens. Thanks for the tip about the proper cream. I’m sure I would not have noticed to buy the right one.
Thanks so much for sharing, Liz…GREAT job!
Now I’m craving all the scones with clotted cream, of course!
Always I wanted make my own Clotted cream !!AWESOME Lizzy! and is amazing with scones :))) thanks dear!!
I need to try this cream when I make scones next time ♥
summerdaisy.net
Oh yum clotted cream, I read one could make it at home, nice to know how now. I wish one day I get my hands on milk right from the cow!
Have never tried this …. wondering if unpasteurized cream would have the same results. Your scones look wonderful – I could use one right now!
I bet it would, Rosella. Good scones are SO tasty, aren’t they??
I’m laying in bed, waiting for my clotted cream and scones. Where are you?
Dear Lizzy, how wonderful! I never knew how simple it was to make your own clotted cream. Perfect for so many things. xoxo, Catherine
Sounds like it would work well with a true slow cooker where low=180 degrees. Both scones look great:@)
I always wanted to make my own clotted cream! I am keeping this to try!