Peanut Butter Truffle Brownies
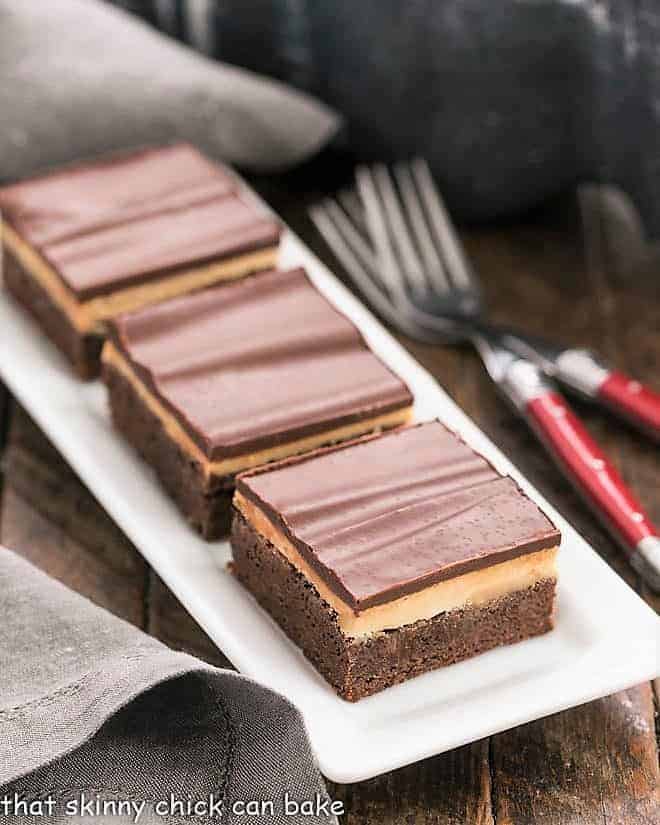
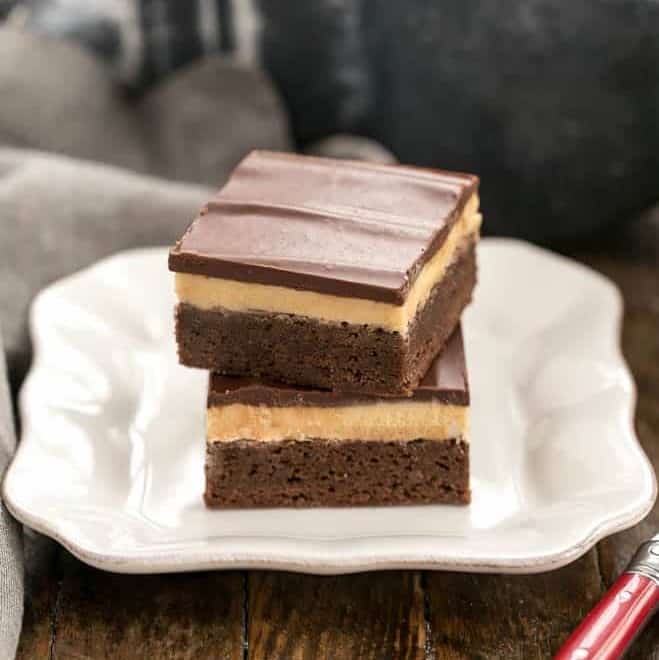
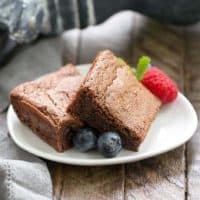
These delicious, irresistible Peanut Butter Truffle Brownies combine that out-of-this-world pairing of chocolate and peanut butter! Brownies are topped with a peanut butter truffle filling and then finished off with a silky ganache topping.
You can put those Reese’s Peanut Butter Cups back in the bag for now and indulge in these marvelous layered peanut butter brownies instead!
Why You Must Make
I first made these peanut butter brownies back in 2011 for a weekend reunion with some fabulous friends from college. These were those sorority sisters with whom I ate bags of chips and M & M’s. We also were known to make nachos in the sorority microwave after coming home late from the bars. I knew they’d be perfect for our tailgate.
Cut into squares and packed up in a cooler, these peanut butter truffle brownies made their way across three states to a homecoming football game at my alma mater. I paid about as much attention to the game that day as I did in college. The hubby is still shocked I went to the Rose Bowl and Peach Bowl back in the day, too.
- Obviously, they’re a portable treat!
- And these brownies are finger food, so perfect for picnics and tailgates!
- They are made with the iconic pairing of peanut butter and chocolate. If you’re a Reese’s lover, you’ll flip over these brownies!
Reader Endorsement:
From Susan in the comments: Made these last night. Brought them to work today, and they had rave reviews, I was told that this was a keeper recipe. The peanut butter layer is so light and fluffy.
Ingredient Notes
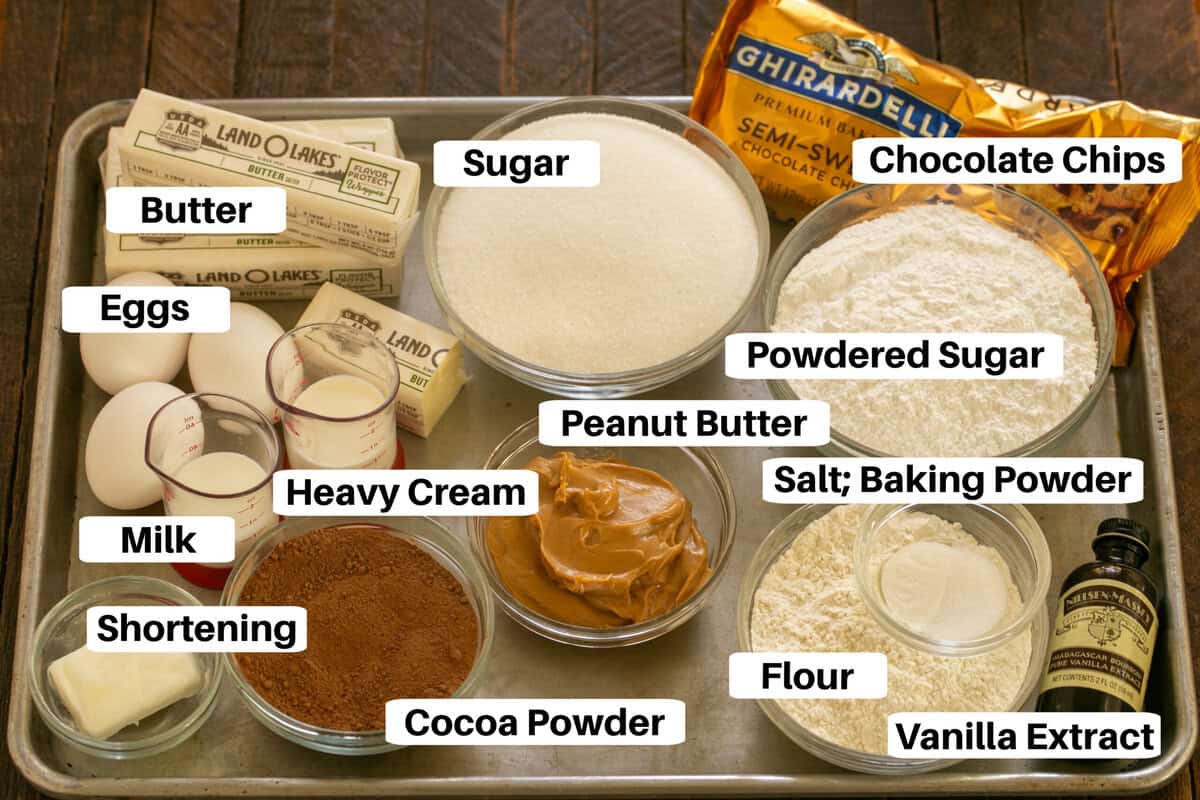
- Kitchen Staples – Sugar, Flour, Salt, Milk
- Butter – Salted is OK as there’s not enough to make the bars taste salty. Salt is a flavor enhancer and desserts can taste flat if there is no salt in the recipe. Have your butter at room temperature as this will make for much easier blending.
- Eggs – All my recipes use large eggs unless otherwise noted. Pull them out of the refrigerator about an hour before you start mixing. They will incorporate more easily if not cold.
- Vanilla Extract – Make sure the label reads real vanilla extract. Artificially flavored vanilla doesn’t taste nearly as good as the real thing!
- Cocoa Powder – I use Ghirardelli or Hershey’s brands. Sift first if your cocoa has a lot of lumps.
- Baking Powder – This is not the same as baking soda. You must use baking powder as baking is a science and these two products work differently. Note: baking powder is used much less frequently and expires much faster than baking soda. If it’s still active, it will bubble vigorously if you put a spoonful into a cup of hot water. If it doesn’t, replace it before starting this recipe.
- Creamy Peanut Butter – My family likes the Jif brand so that’s what I used.
- Powdered Sugar – Like cocoa powder, sometimes this can be lumpy. Sift if needed before using.
- Semisweet Chocolate Chips – I used the Ghirardelli Brand, but Nestles will work well, too.
- Shortening – Helps keep the chocolate topping shiny when it cools. I keep Crisco sticks on hand.
- Heavy Cream – Optional (I suggest adding if using chocolate chips).
How to Make


Recipe Tips
As with every recipe, read through the instructions before starting in order to familiarize yourself with the procedure. Also, double-check that you have all the ingredients on hand.
- Usually, I pull out the butter and eggs before I start baking. Since part of the butter is melted in the microwave, only the butter for the filling and the eggs need to be brought to room temperature.
- For both the brownie batter and the peanut butter filling, I use an offset spatula (affiliate link) to spread each layer out evenly. This makes for a prettier presentation.
- The first time I made this recipe, I used a bag of semi-sweet chocolate chips for the ganache topping. Since then, I’ve found I like the way Ghirardelli chocolate bars (affiliate link) melt better than chocolate chips.
- Feel free to use 12 ounces of either chocolate chips or chocolate bars. If you use chocolate chips, you may need to add 2 tablespoons of cream to the mixture.
- As with most of my brownies and bars, they cut best after some time in the refrigerator. Use a warm, dry knife to easily slide through the ganache topping and wipe the knife off between cuts.
- For more details, check out my post on How to Cut Perfect Cookie Bars.
You May Also Like:
- Better Than Reese’s Peanut Butter Bars
- Stuffed Peanut Butter Rice Krispie Treats
- Frozen Chocolate Peanut Butter Pie
- Tagalong Cookie Bars
- No-Bake Chocolate Peanut Butter Cookies
I spotted many decadent versions of these Buckeye Brownies across the Internet, and I’ve pieced together a few recipes and added my own twist. My fabulous friends from college adored these layered peanut butter brownies—they were inhaled!!
These little gems are outrageously rich and delicious. If you like Reese’s, try a batch of these decadent peanut butter truffle brownies.
Note: These brownies were first shared in 2011. The photos and text were updated in 2019.
Peanut Butter Truffle Brownies
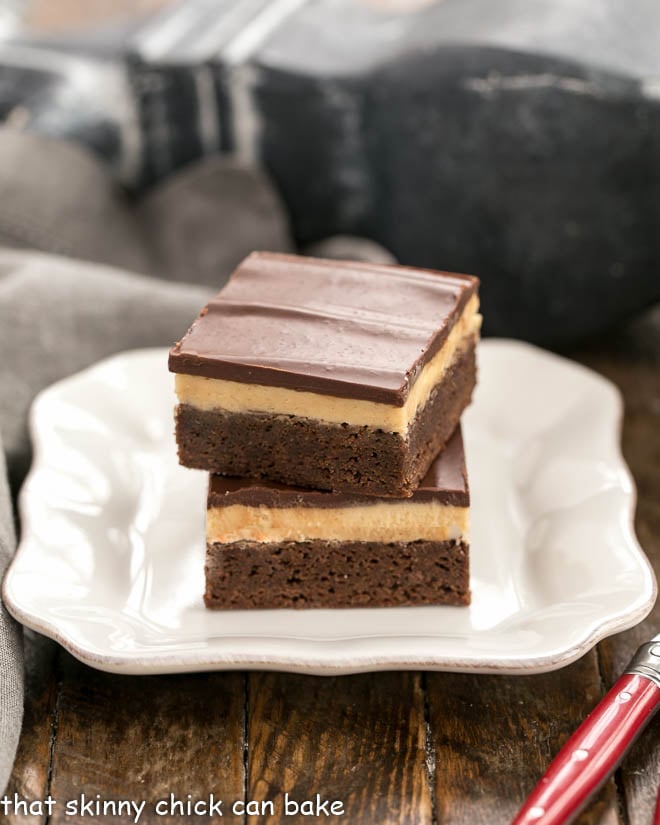
Rich, fudgy brownies topped with peanut butter truffle filling and iced with chocolate ganache!
Ingredients
Brownies:
- 1 cup butter
- 2 cups sugar
- 3 eggs
- 1 tablespoon vanilla
- ⅔ cup cocoa powder
- 1 cup flour
- ½ teaspoon salt
- ½ teaspoon baking powder
Peanut Butter Filling:
- ½ cup butter (at room temperature)
- ½ cup creamy peanut butter
- 2 cups powdered sugar
- 2-3 teaspoons milk
Ganache Topping:
- 2 cups semi-sweet chocolate chips
- ¼ cup butter
- 2 tablespoons shortening
- 2 tablespoons heavy cream, optional (I suggest adding if using chocolate chips)
Instructions
- Preheat oven to 350º.
- Line a 9 x 13-inch pan with non-stick foil. Set aside.
- In a large microwave-safe bowl, melt the 1 cup butter in the microwave.
- Mix in sugar, then eggs and vanilla.
- Sift the cocoa powder into the egg mixture, along with the salt and baking powder. Mix well.
- Add flour and mix till just combined. Scrape into prepared pan and smooth top.
- Bake for about 25-30 minutes. Cool completely.
- While the brownies are cooling, mix together the filling ingredients.
- Beat until smooth adding the extra teaspoon of milk if needed. The mixture should be spreadable. Spread filling evenly over cooled brownies.
- Chill for at least 30 minutes.
- While the filling is cooling, make ganache by melting the chocolate chips, butter, shortening, and cream (if using) together gently in the microwave.
- Stop and stir at 30-second increments, till melted and smooth.
- Put dollops of ganache over the filling and carefully spread it across the filling with a small offset spatula. Return to refrigerator to set topping.
Notes
Adapted from Betty Crocker, Loves to Eat and Sweet Pea's Kitchen.
Check the expiration date on your baking powder. Unlike baking soda, it often expires before you can use it up. If you're unsure if it's still active, put a spoonful in a cup of very hot water. If it bubbles vigorously, it's still good.
Nutrition Information:
Yield:
24Serving Size:
1 brownieAmount Per Serving: Calories: 373Total Fat: 23gSaturated Fat: 13gTrans Fat: 1gUnsaturated Fat: 8gCholesterol: 61mgSodium: 198mgCarbohydrates: 42gFiber: 2gSugar: 34gProtein: 4g
Lambeau has not made an appearance on my blog in a while, so to celebrate Halloween, I present her as Moammar Gooddoggi:

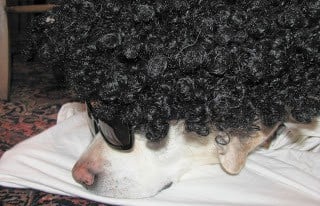
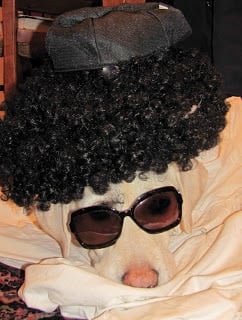
Isn’t she a good sport??? Do you want to guess the number of marshmallows it took to bribe her into posing? LOTS!





103 Comments on “Peanut Butter Truffle Brownies”
Made these last night. Brought them to work today, and they had rave reviews, I was told that this was a keeper recipe. The peanut butter layer is so light and fluffy. I only baked the brownies for 23 minutes and they were nice and fudgy. So glad I finally tried these!
Yay!! So glad you loved these as much as we do, Susan! Thanks for reporting back 🙂
regarding about the peanut butter, should it be unsweetened? or can i use the sweetened ones?
I use Jif which is slightly sweetened. You can use an unsweetened peanut butter, but it has to be thick, not pourable, for the right consistency. Hope this helps!
These brownies are my idea of perfection! We loved everything sabout them!
The layers in these brownies are so good! I love adding peanut butter to chocolate!
These were perfect for a peanut butter lover like myself! So decadent!
This wonderful recipe takes me back to FoodBuzz!
Oh my, I think I would become addicted to these beauties.
I’m a Reese’s Peanut Butter Cup fan so these work for me.
Oh my,vI might have to invent a moment to make these! We have plenty of Reese’s lovers in our house! And it was so nice to see Lambeau again. Bittersweet, I know.
These brownies look amazing! Reese’s pale by comparison.
PB and chocolate for the win! These bars are stunning. I would not be able to stop at 1!
No heat when I got home, boiler acting wonky… SERIOUSLY need one of these brownies!!! And aw, the pics of Lambeau make me smile:@) Need an Izzy update!
Bring on the truffle brownies, these look heavenly!
Oh, la la, Liz! Truffles, brownies, and peanut butter, woo hoo! They look and sound delicious, perfect for Valentine’s Day! Happy Day to you and thanks for the recipe!
These look just heavenly! the layers look so creamy and delicious! Peanut butter and chocolate are one of my favorite combinations. If it’s in the house – it’s devoured!
Lambeau looks so adorable in her costume. LOL Moammar Gooddoggi and that wig – spot on!
I might drive across 3 states to have one of these. Probably two. Delish!
I have been looking for a recipe close to what my Grandmother would make for my birthday. I think this one is going to be close!
I’m so glad, Sarah! Hope you love them as much as we do!!!
Mouth is watering, can’t wait to make these again!
Too bad I can’t reach through the PC screen and grab a bite! L 😛 L
These are the ultimate brownies for sure
These brownies are fit for the queen 🙂 Luscious, and so tempting!
You’ve never failed to entice me with your treats, Liz! xoxo
Heaven. I’m all about these brownies
Very stylish dog. You maintained to get away with just chocolate buttons, fortunate. I would have requested for at least a group of the PB truffles
Aw! She was a excellent sport! Too bad she couldn’t have one of these delicious cookies as a compensate.
Oh my, that looks like a dream dessert – quite a bit of work but impressive. Your doggie is very patient with all the dressing up – too funny!
These sound amazing! Three layers of awesome!!!
Well, there is no question whether or not I will be making these! I just love Lambeau!
OK so how cute is this? Moammar Gooddigi, too funny! ANd as for the brownies… what can be said about perfection in confection? Seriously yummy, Lizzy, most well deserved Top 9!
Those peanut butter brownies are impressive!! They looks great and I love the photos!
Those peanut butter truffle brownies and Moammar Gooddoggi are both adorable! 🙂
It looks delicious! I have to try!
Thanks for sharing!.
Begoña
I saw these on Food Buzz and had to rush right over, congrats! I am still chuckling over your dog, I can’t decide which one is best, they are all hysterical. You are the next Wegman!
NY Baker…sorry for my omission! These are baked in a 9 x 13 inch pan.
Whoa….my son would LOVE these!
Bravo on No1 and no wonder – they look fabulous, Lizzy. Amazing what I’ve missed in 2 days already. Too funny with your lovely doggie: he is definitely cool in your sunglasses.
Haha your puppy gave me a much needed laugh today. Thank you for that!
Your brownies look…amazing!
Congrats on #1!! These brownies sure are worthy of the top spot. They look magnificent!
Congrats,Dear!:)
Love the costumes – so adorable! Love the brownies too – they look awesome.
These look incredible!!
Congrats on the Top 9 today, #1!!!!
Oh, man. I am salivating at work, yet again. These look absolutely perfect!
And congrats!
Congratulations on Toop 9!
I agree: this brownies look yummy! But what size pan does one use? It’s not specified in the recipe. 9×13? 8″ square? Thanks for clarifying this.
These look simply divine! Another great recipe…..
Rich and decadent – I’m sold! These sound like such a fantastic treat.
Lizy, thank you for finding my x-mas gift for my father-in-law! I will be his most favorite of all this year! These are outstanding. Your dog is such a good sport!
Lucen impresionantes y muy original,felicitaciones,abrazos grandes hugs,hugs.
Those look awesome. Peanut Butter + Brownies = Heaven!
Haha, aw, your doggie is so cute!
And, these bars look amazing!
LOL!! Your doggie Lambeau (what a cool name) is so cute. Yes she’s a good sport! My 5 year old son didn’t even listen to me to wear his Warrior helmet… Yummy desserts as always!
These brownies look awesome, can’t wait to give them a try!! Love the pooch! The costume is hysterical.
Truly sinful!
Mmm sooo drool-worthy!! These look absolutely amazing, I wish I could grab one right out of this screen! I could really use an amaaaazing snack to get me through this work day 😉
Not that it would be good for him but for posing like he did, I think your dog should get a taste of these delicious looking brownies!
P.S. I can’t believe that he eats marshmallows!!
–Not sure what I’d rather kiss…the brownies or the dog :)) XX
the brownies looks delicious!
I love u put peanut buttr on the brownies = perfect lizzy! 🙂
and ur dog looks cute 😉
Oooh the brownies looks so decadent , would lve to have a slice 🙂 .
Love fudgy brownies..peanut butter filling sounds terrific.
Brownies again wow!!!
Doggies looks so funny and cute
I love Lambeau…she’s always so patient, and sweet…and now, dressing her in a Halloween costume; priceless!
Love your Peanut Butter Truffle Brownies. Perfect, yummy, and over the top delicious!
Happy Halloween, my dear friend!
xoxo
Liz,
Your Peanut Butter Truffle Brownies are wonderful with all the layers of flavor, and the ganache on top, so decadent.
How did you get Lambeau to wear that costume? My dog wouldn’t sit still for 2 seconds. Good dog, Lambeau!
I’ll have to try the marshmallows.
Those brownies look awesome–do you think they would work with a darker chocolate? Love how Lambeau looks!
What a riot and what a sport! Your lab is adorable. Love the hat, glasses and smock.
I loved Truffles so much that when we got our golden brown Pomeranian, I named him “Truffles”. Happy sweet Halloween!
Oh, I just love your doggie and that costume! Oh, and I love these heavenly brownies too!!
Oh Liz, I love, love this decadent brownie…and so would my peanut-butter loving son-in-law!
Lambeau is much prettier as Moammar Gooddoggi than the original!! (Love the name!) Hilarious!
Thanks for sharing! Happy Halloween!
So cute the pictures of the dog 🙂
The brownies look awesome…love all the three layers.
Hope you have a wonderful week ahead Liz!
I love it, your pooch is such a trooper. Too cute!
This one really looks delicious! And nice outfit for the dog 😛
Lizzy, your dog is the cutest dog ever!!! <3
These brownies sound decadent and delicious! I am sure my kids would devour them!!!
Happy Halloween! 🙂
The loss of marshmallows was worth the post. We used to try and dress up Sadie but she got horribly depressed. Should have thought of the marshmallow trick! Oh – and the brownies – yes – to the brownies to the truffle filling – to peanuts and chocolate. But beware – it’s hard to remember the brownies after you introduce us to Lambeau.
Ciao sono entusiasta di averti trovata, hai un blog delizioso, ti seguo con piacere 😉
Buona serata
Sonia
Love the brownies! Anything with chocolate and peanut butter is a winning combination for me!
Your dog must really LOVE marshmallows!
What a GREAT costume for you doggie! Happy halloween and these brownies are OMG delicious!
Lizzy, these look so good1 Man I really am wanting to make up a batch!
Have a great Day…HAPPY HALLOWEEN!
Ohhhh…Lambeau is so cute! Love her costume! And my, those brownies look so delicious! I bookmarked the recipe and will definitely try it!
Now those brownies are my kind of dessert! The have the two flavor combos I really love, peanut butter and a lot of chocolate! Mmmmmm! Love your dog.. Happy Halloween! 🙂
The brownies look awesome!Happy Halloween :),Miriam@Meatless Meals For Meat Eaters
My dear Lizzy these look absolutely delicious this is my type of sweets!! look beauty and decadent!! Have a nice Halloween, I love your dog, my daugther make the same with one of my dog, xxgloria
Oh my word! I would positively die for one of those brownies!! I love Reeses cups.
I bought some Reeses when I visited Singapore back in July and couldn’t stop eating them! This brownies really look delicious! And that dog of yours, she’s cool!
That is a hilarious costume for your dog….so creative! And these brownies…all of my favorites combined in one. They sound so decadent!
Your pup IS a good sport, mine wouldn’t take it for 2 seconds.
The brownies look inviting, as always. I’m thinking.. if it’s adapted from 3 different recipes, that THIS is your recipe alone, right?!
hahahahah Lizzy you made my day with the cute pics of Lambeau, thank you so much for this. She is more attractive this time then the ganache.
Happy Monday to you too and I simply cannot stop admiring and at the same having a good laugh over Lambeau. Say hi to her on my behalf.
LOL! the pics of the dog is too funny. those truffle brownies look sinful- just perfect for this sweet tooth of mine!
I really tried hard not to see these brownies but I’m so happy I did! Love the combo, love the look and I’m sure I’d be in heaven after eating a couple of them!
oooh, these look positively sinful, my dear, they look like a bit like “bajadera”, a sweet very popular here in my Balkan region of the world 🙂
You just can’t get too much peanut butter, that’s for sure!
What a cutie that Lambeau! Is he named for Curly Lambeau?
Aww… he’s so adorable!
Your brownies sound like truffle heaven!
LoL moamar gooddoogi,,,its cute,,,peanut butter truffle sound delish to me,,YUM-YUM,,
Lambeau is a terrific sport! I’m not sure that my yellow labs would have allowed me to dress them up.
And once again you have produced another dangerously good looking dessert.
What a good sport the dog was how did you manage to get him to participate … nice so cute. I needed that smile! These would make my son Curt flip, I will have to surprise him last night made some spooky peanut butter cups, so I will have lots of leaveovers to try this one… love it! divine!!!
Very trendy dog. You managed to get away with just marshmallows, lucky. I would have asked for at least a batch of the PB truffles
Anything with the name “truffle” in the title is no doubt heavenly. I like the flavor layering as well as the mix of textures. Yum!
It is amazing that your dog even stayed still for the pictures-too cute!
This brownie is just gorgeous! I could die for it! They look so so good!
looks so good and your dog is such a good sport!
Aw! She was a good sport! Too bad she couldn’t have one of these yummy brownies as a reward.
She’s too adorable!!
I would love to get a hold of these brownie treats!